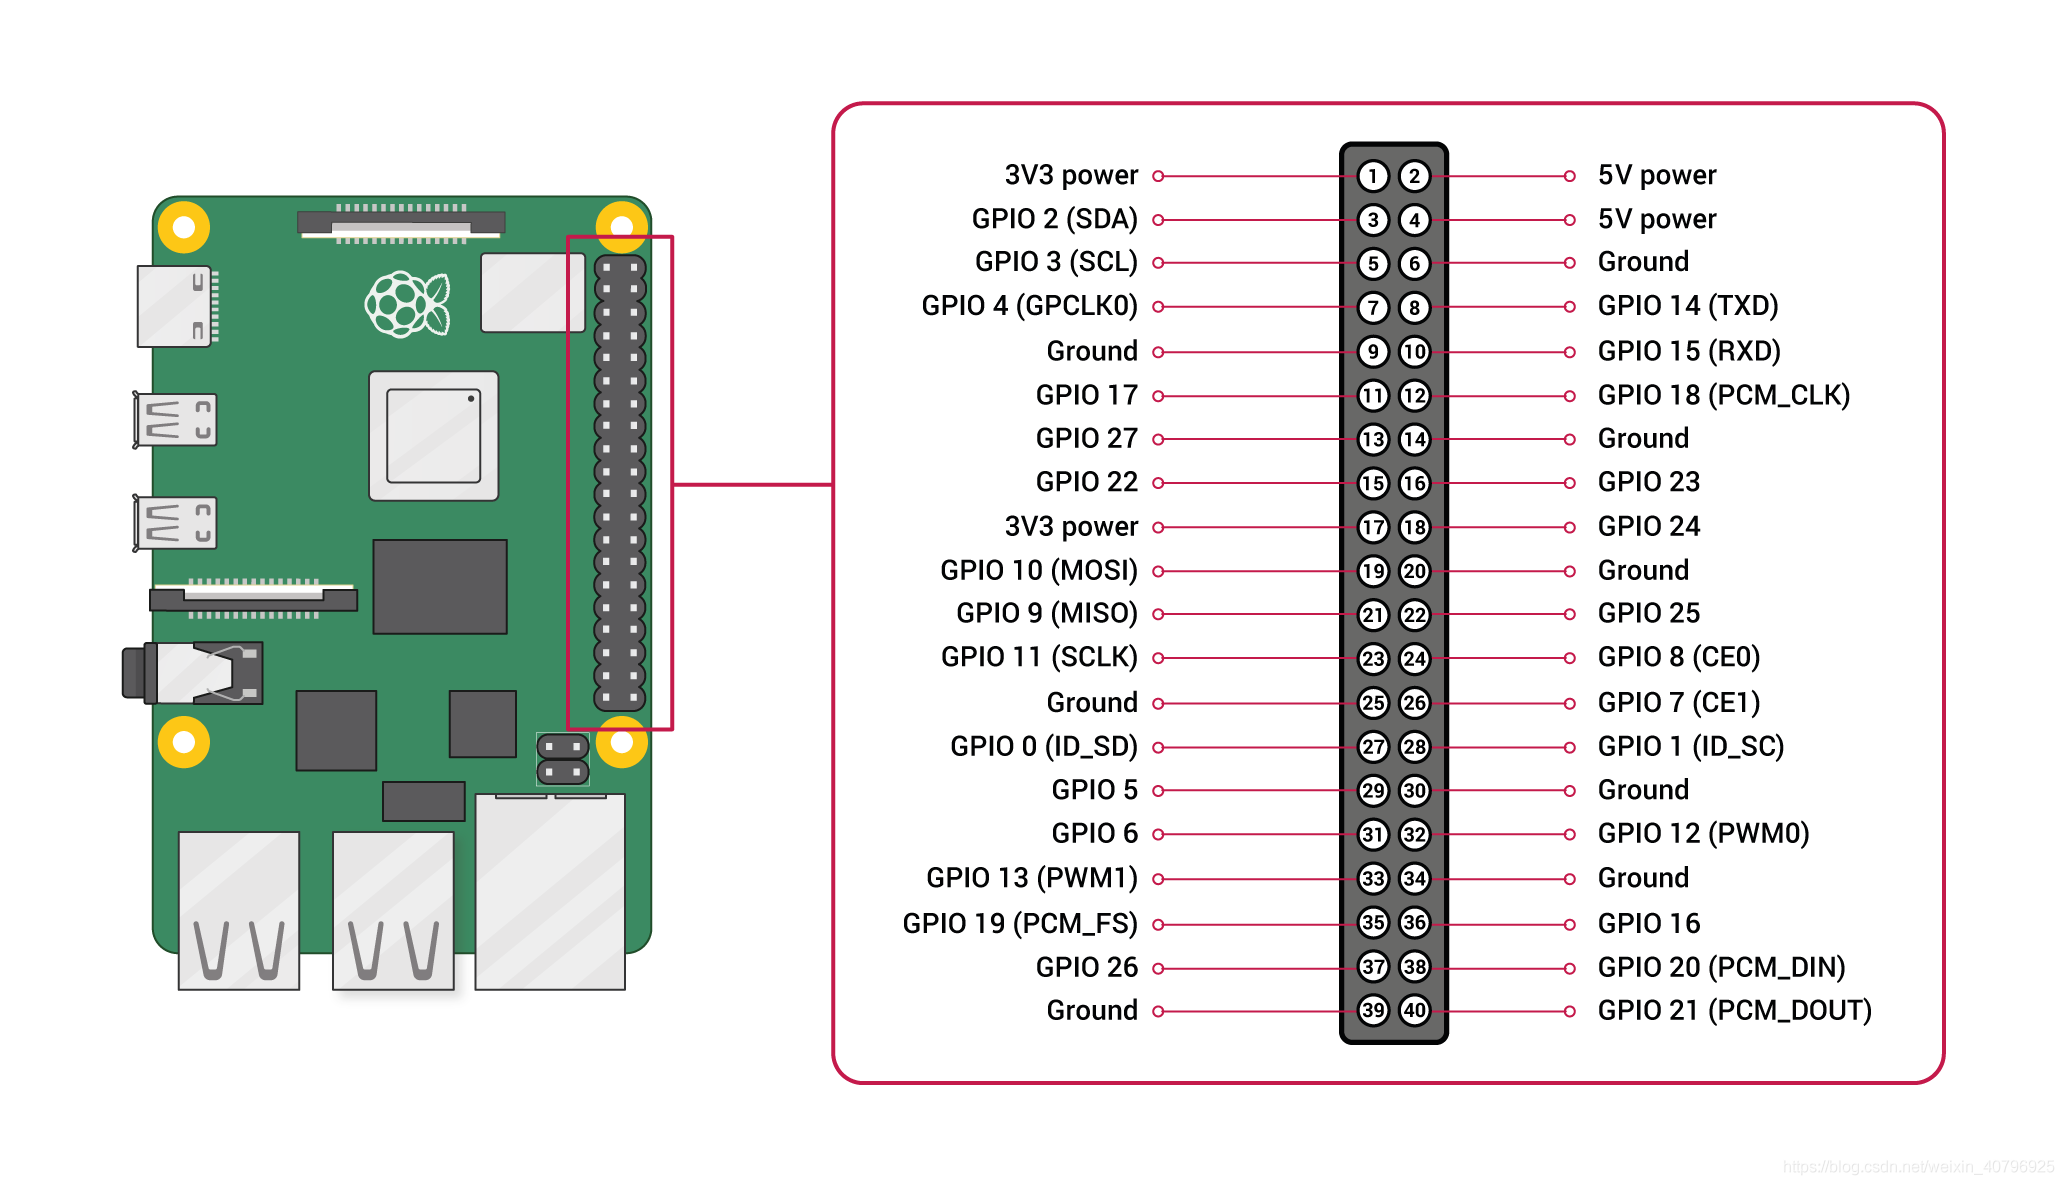
/boot/firmware/config.txt 是 Raspberry Pi 系統中用來設定硬體行為的設定檔,主要在啟動階段由 GPU bootloader 讀取。這個檔案允許你設定像是顯示輸出、音訊介面、I2C/I2S/SPI 啟用、裝置樹載入與參數等。
⚠️ 注意:/boot/firmware/config.txt 是 Raspberry Pi OS 使用 UEFI 或 Ubuntu 系統的名稱,傳統 Raspberry Pi OS 使用的是 /boot/config.txt。
aplay -D hw:0,0 -r 16000 -f S16_LE -c 2 test.wav
arecord -D plughw:3,0 -d 5 -f S16_LE -r 16000 -c 2 test.wav
-d 5 :錄音時長 5 秒
-f S16_LE :格式為 16-bit 小端(Little Endian)
-r 16000 :取樣率 16000 Hz
-c 2 :雙聲道
dtc -I fs /proc/device-tree | less
2025/07/20
2025/04/20
[Linux] DTS
如何從執行中的檔案系統截取出 DTS
在已執行的系統中,其檔案系統格式的 DTS 位於:
/sys/firmware/devicetree/base/
而 /proc/device-tree 只是一個 soft link 連結到上述的位置。
另一個為 DTB 格式的 DTS 則是位於:
/sys/firmware/fdt
$ dtc -I dts -O dtb -o device-tree.dtb device_tree.dts
在 /sys/kernel/config/device-tree/overlays/ 目录下创建目录,创建完成后目录内自动会有三个文件 dtbo path status
直接复制 已经编译好的 *.dtbo 文件覆盖 dtbo 文件.
2025/04/15
[Linux] Macro
#define DEVICE_ATTR_RW(_name) \
struct device_attribute dev_attr_##_name = __ATTR_RW(_name)
#define __ATTR_RW(_name) __ATTR(_name, 0644, _name##_show, _name##_store)
#define __ATTR(_name, _mode, _show, _store) { \
.attr = {.name = __stringify(_name), \
.mode = VERIFY_OCTAL_PERMISSIONS(_mode) }, \
.show = _show, \
.store = _store, \
}
#define ATTRIBUTE_GROUPS(_name) \
static const struct attribute_group _name##_group = { \
.attrs = _name##_attrs, \
};
struct attribute_group {
const char *name;
umode_t (*is_visible)(struct kobject *,
struct attribute *, int);
umode_t (*is_bin_visible)(struct kobject *,
const struct bin_attribute *, int);
size_t (*bin_size)(struct kobject *,
const struct bin_attribute *,
int);
struct attribute **attrs;
union {
struct bin_attribute **bin_attrs;
const struct bin_attribute *const *bin_attrs_new;
};
};
struct attribute {
const char *name;
umode_t mode;
#ifdef CONFIG_DEBUG_LOCK_ALLOC
bool ignore_lockdep:1;
struct lock_class_key *key;
struct lock_class_key skey;
#endif
};
CLASS_ATTR_RW(xxx); <<-- xxx代表你想要的节点名字,可以任意字符内容
||
||
\/
struct class_attribute class_attr_xxx = <<--xxx是宏定义的括号里的内容
{
.attr = {
.name = "xxx", <<--这里就是宏定义的括号里的内容,你想要的节点名字
.mode = VERIFY_OCTAL_PERMISSIONS((S_IWUSR | S_IRUGO))
},
.show = xxx_show, <<--xxx也是宏定义括号里的内容,根据你括号里的内容而变
.store = xxx_store <<--xxx也是宏定义括号里的内容,根据你括号里的内容而变
};
2025/04/12
[Linux] Commands
[GPIO]
gpioinfo // 板子定義gpio
gpioget gpiochip* [pin]
gpioset gpiochip* [pin]=[1/0]
cat /sys/kernel/debug/gpio // 真實ic定義gpio 給 gpio_request()
[Network]
nmcli r wifi [on/off]
[I2C]
i2cdetect -y 1
// i2cdetect:用於列出某個 I²C 匯流排上已連接的裝置。// -y:跳過互動式確認(直接執行,不提示)。
// 1:代表第 1 號 I²C 匯流排(Raspberry Pi 上通常是 /dev/i2c-1)。
2025/04/05
[Linux] Simple Makefile
obj-m += "file_name".o
PWD := $(CURDIR)
all:
$(MAKE) -C /lib/modules/$(shell uname -r)/build M=$(PWD) modules
clean:
$(MAKE) -C /lib/modules/$(shell uname -r)/build M=$(PWD) clean
2025/04/04
[Raspberry] Pi 4 share folder
sudo apt install samba
編輯 /etc/samba/smb.conf
首先找到 workgroup
把 workgroup 設成和 Windows 一樣的 (可以在設定/系統/關於/進階系統設定/電腦名稱找到)
預設是 WORKGROUP
workgroup = WORKGROUP
加入要分享的資料夾
直接將以下這段放在smb.conf最下面即可:
[要分享的資料夾的名稱]
comment = "描述"
path = /home/"user"/share
browsable = yes
read only = no
create mask = 777
directory mask = 777
加入使用者
sudo smbpasswd -a <UserName> <password>
Linux ethernet 網路設定
192.168.xx.xx/24
255.255.255.0
192.168.1.1
WIndow加入
連線網路磁碟機->192.168.xx.xx
[Raspberry] Pi 4 Enable serial0
[install_raspi-config]
https://github.com/EmilGus/install_raspi-config/blob/master/README.md
Start raspi-config: sudo raspi-config
Select option - Update
Reboot
Select option 3 - Interface Options
Select option P6 - Serial Port
At the prompt Would you like a login shell to be accessible over serial?, answer 'No'
At the prompt Would you like the serial port hardware to be enabled?, answer 'Yes'
注意:如果您在樹莓派上安裝了 Ubuntu 作業系統,請進行如下組態:
在 /boot/config.txt 加入 enable_uart=1
在 Ubuntu系統的文件 /boot/firmware/cmdline.txt中刪除
console=serial0,115200(類似於在樹莓派系統中文件/boot/cmdline.txt)
運行以下命令關閉序列控制台:
sudo systemctl stop serial-getty@ttyS0.service && sudo systemctl disable serial-getty@ttyS0.service
請確保您已安裝python 序列庫 pyserial,而不是來自 apt 的 python-serial。
建立 udev file (/etc/udev/rules.d/50-tty.rules),並加入以下內容:
KERNEL=="ttyS0", SYMLINK+="serial0" GROUP="tty" MODE="0660"
KERNEL=="ttyAMA0", SYMLINK+="serial1" GROUP="tty" MODE="0660"
運行以下命令多載 udev 規則:
sudo udevadm control --reload-rules && sudo udevadm trigger
2025/04/03
[Linux] nano cmd
- Ctrl+K 剪下整列或選取範圍
- Alt+6 複製整列或選取範圍
- Ctrl+6 開始選取
- Ctrl+U 貼上剪貼簿內容
- Alt+U Undo
- Alt+E Redo
- Alt+Del 刪除整行
- Alt+3 Comment/Uncomment
- Alt+/ || Alt+G 跳到指定行數
- Ctrl+G Help
- Alt+W || F6 尋找
- Alt+Q 尋找下一個
- Alt+W 尋找上一個
- Alt+R 尋找並置換
- Alt+X 關閉下方 Help 提示
- Ctrl+S 存檔
- Ctrl+O 另存新檔
- Ctrl+X 退出
訂閱:
意見 (Atom)
